Below is a preliminary review of our process which is only in the first iteration. More results and comments are forthcoming.
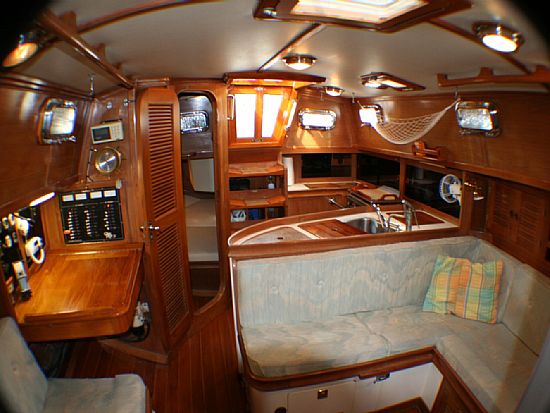
Regarding lacquer on the interior, initially we had mixed results, but mostly due to our shortcomings with surface preparation. Although I have heard the phrase used in association with this technique, I don't know if French Polishing is the right term to use for what we are doing, but I think the use of "padding lacquer" is a good approach for the interior. The only better option in my opinion would be to spray on the lacquer, but that means so much prep and and a big long term job. Padding lacquer enables you to work on very small areas at a time, a huge advantage in our opinion.
We use Behlen Qualasole Padding Lacquer, already mixed and ready to apply. I heard it requires much experimenting to get the mix right if you do it yourself but it may not be that hard - time for trial and error was just not available. There are other similar products but Qualasole is available locally and works well. We don't add any colorant because we love the natural color of the Costa Rican teak.
We have found that if we get the surface properly ready to finish, the padding lacquer is great for many reasons. It is really easy to apply. You work a small area at a time and easily overlap into the adjoining (already finished) area with no problems. You pour it out of the container directly into your pad so there are no brushes, containers, or any thing to clean up. It dries so fast that you can put on many coats in a day. You can touch up small areas without having to worry about how you will feather it into the surrounding finish. Also because it dries so fast the odor vanishes very quickly, unlike varnish which takes many days to cure - a great benefit for the close quarters of a boat interior. We store the pad in a ziplock type sandwich bag and reuse it many times although it eventually hardens up if you stop using it for long enough or don't get the air out of the bag.
We make a "pad" by folding up a small piece of an old T-shirt for absorption of the lacquer and wrap that in a small piece of soft linen (washed and preferably dried in an automatic dryer to reduce lint) which dispenses the lacquer smoothly. We use old used linen napkins (almost free at garage sales). The pad should be 3 - 4 inches across. Before rolling it all up, snap the linen a few times to get any lint and dust out. You work in a circular or figure of eight motion, avoiding stopping the pad anywhere. You can also use a sweeping motion like the touch and go technique of pilots. You need to put on lots of coats, but it is easy and you can get out your pad and lacquer bottle, do a little bit at any time - even underway - then put away your materials in a half a minute. The only thing besides the lacquer and pads that gets used up are the disposable gloves for your padding-hand. We use latex gloves because nitrile and some of the other materials don't hold up well to the volatile lacquer.
If you are touching up a previous lacquer finish with no water stains or sun-damaged rough surface, you can go right over the old lacquer because it melts the surface slightly and bonds to the current finish. There is no need to sand between coats unless you leave some streaks or high spots. Then very light sanding takes it off. If there are water stains or the old finish is rough and damaged, you have to strip it down and sand of course. The padding lacquer gives a very soft-looking matte finish. If you want glossy you would have to hand-rub the final coat with something. We have not explored that yet but we have been told that someone with a good source of "hand-rubbing" knowledge works in the shop where we buy the lacquer.
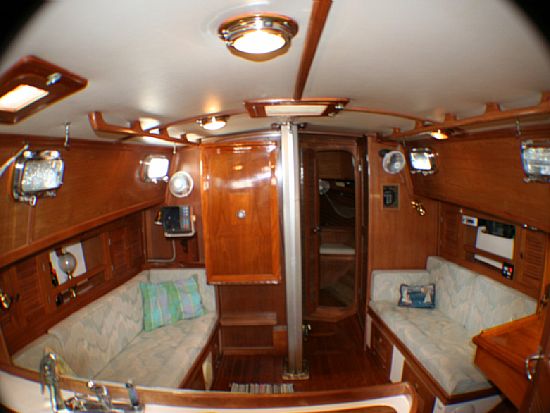
Our interior coach roof vertical surfaces are veneer so we are being very cautious with sanding to avoid taking away too much wood.
I found some sanding sponges for near final finishing and touch-up that go all the way up to 12,000 grit for working some of those special jobs.
We have some areas showing very fine cracks in the finish of our dinette table. I think it was due to all the moisture that had gotten in while down in the Gulf, then when we brought Cigano up to Lake Superior, the moisture couldn't escape fast enough through the finish and froze and expanded in the extreme winter temperatures.
By the way, I learned a trick from a very experienced furniture repairman many years ago. If you are trying to repair a small surface blemish in an otherwise perfectly finished tabletop or similar surface, you can take a small area of the surface down by carefully dragging a razor blade across it (sharp edge trailing of course) and feather it out smoothly. Then you use the padding technique to slowly build the finish back, adding color to the lacquer if necessary.